pygeoapi kubernetes implementation - step 2 - automated deployment
Table of Contents
Introduction
pygeoapi kubernetes series introduction
Automated deployment of pygeoapi
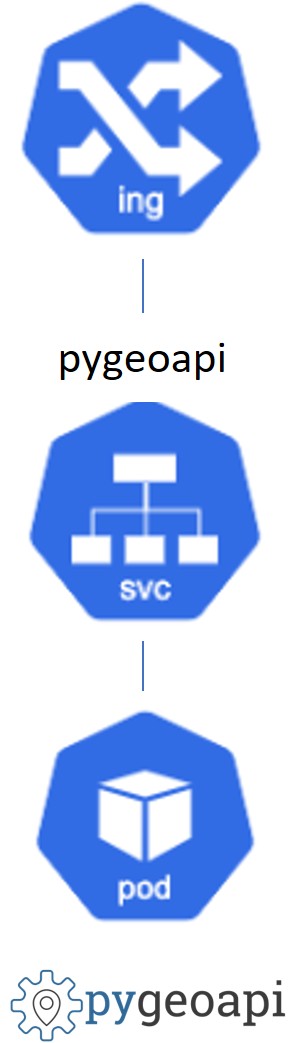
The objective of this chapter is to automate the deployment of a minimal implementation consisting of an Ingress controller and a Service exposing a single pygeoapi pod.
Part 1: Automation Setup
Introduction
The first step to automate application deployment into kubernetes is to create manifests. One manifest configures the Deployment and another one configures the Service. We will also use Kustomize, a manifest management tool built into kubectl as well as Make, a build automation tool.
The source code is available in this repository
Creating Kubernetes manifests
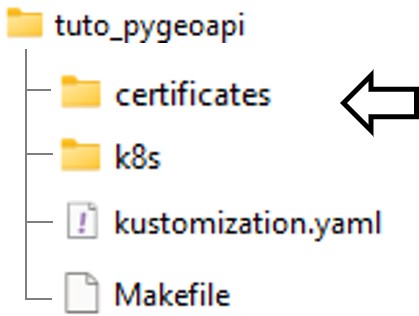
Creating a root folder (e.g. ’tuto_pygeoapi’) and create a k8s subfolder with the following files:
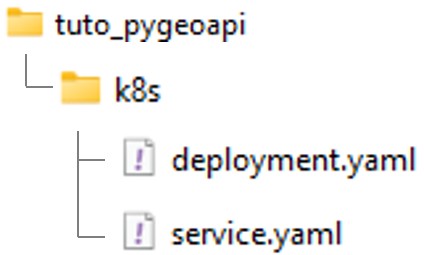
deployment.yaml
apiVersion: apps/v1
kind: Deployment
metadata:
  name: pygeoapi
  namespace: default
spec:
  replicas: 1
  selector:
    matchLabels:
      app: pygeoapi
  template:
    metadata:
      labels:
        app: pygeoapi
    spec:
      containers:
      - name: pygeoapi
        image: geopython/pygeoapi:latest
        imagePullPolicy: IfNotPresent
        ports:
        - containerPort: 80
service.yaml
apiVersion: v1
kind: Service
metadata:
  name: pygeoapi
  namespace: default
spec:
  selector:
    app: pygeoapi
  ports:
  - protocol: TCP
    port: 80
    targetPort: 80
  type: NodePort    # <-- pay attention to the Service type 'NodePort'. This will be updated in Part2
Creating Kubernetes kustomization.yaml and Makefile
Creating the following files at the root of your repository:
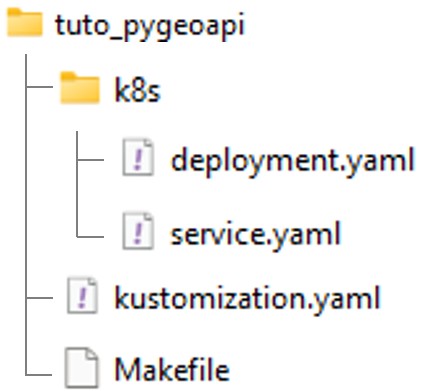
kustomization.yaml
resources:
  - k8s/deployment.yaml
  - k8s/service.yaml
Makefile
deploy:
	kubectl apply -k .

clean:
	kubectl delete -k .
Building and deploying the application
Connecting to WSL and starting Minikube
$ wsl -d ubuntu
$ minikube status                 # Check that minikube is stopped.
$ minikube start --driver=docker  # Start minikube
Accessing folder and execute Make deploy command
$ cd /path-to-tuto-folder/
$ make deploy
kubectl apply -k .
service/pygeoapi created
deployment.apps/pygeoapi created
Enabling port forward
$ kubectl port-forward deployment/pygeoapi 5000:80
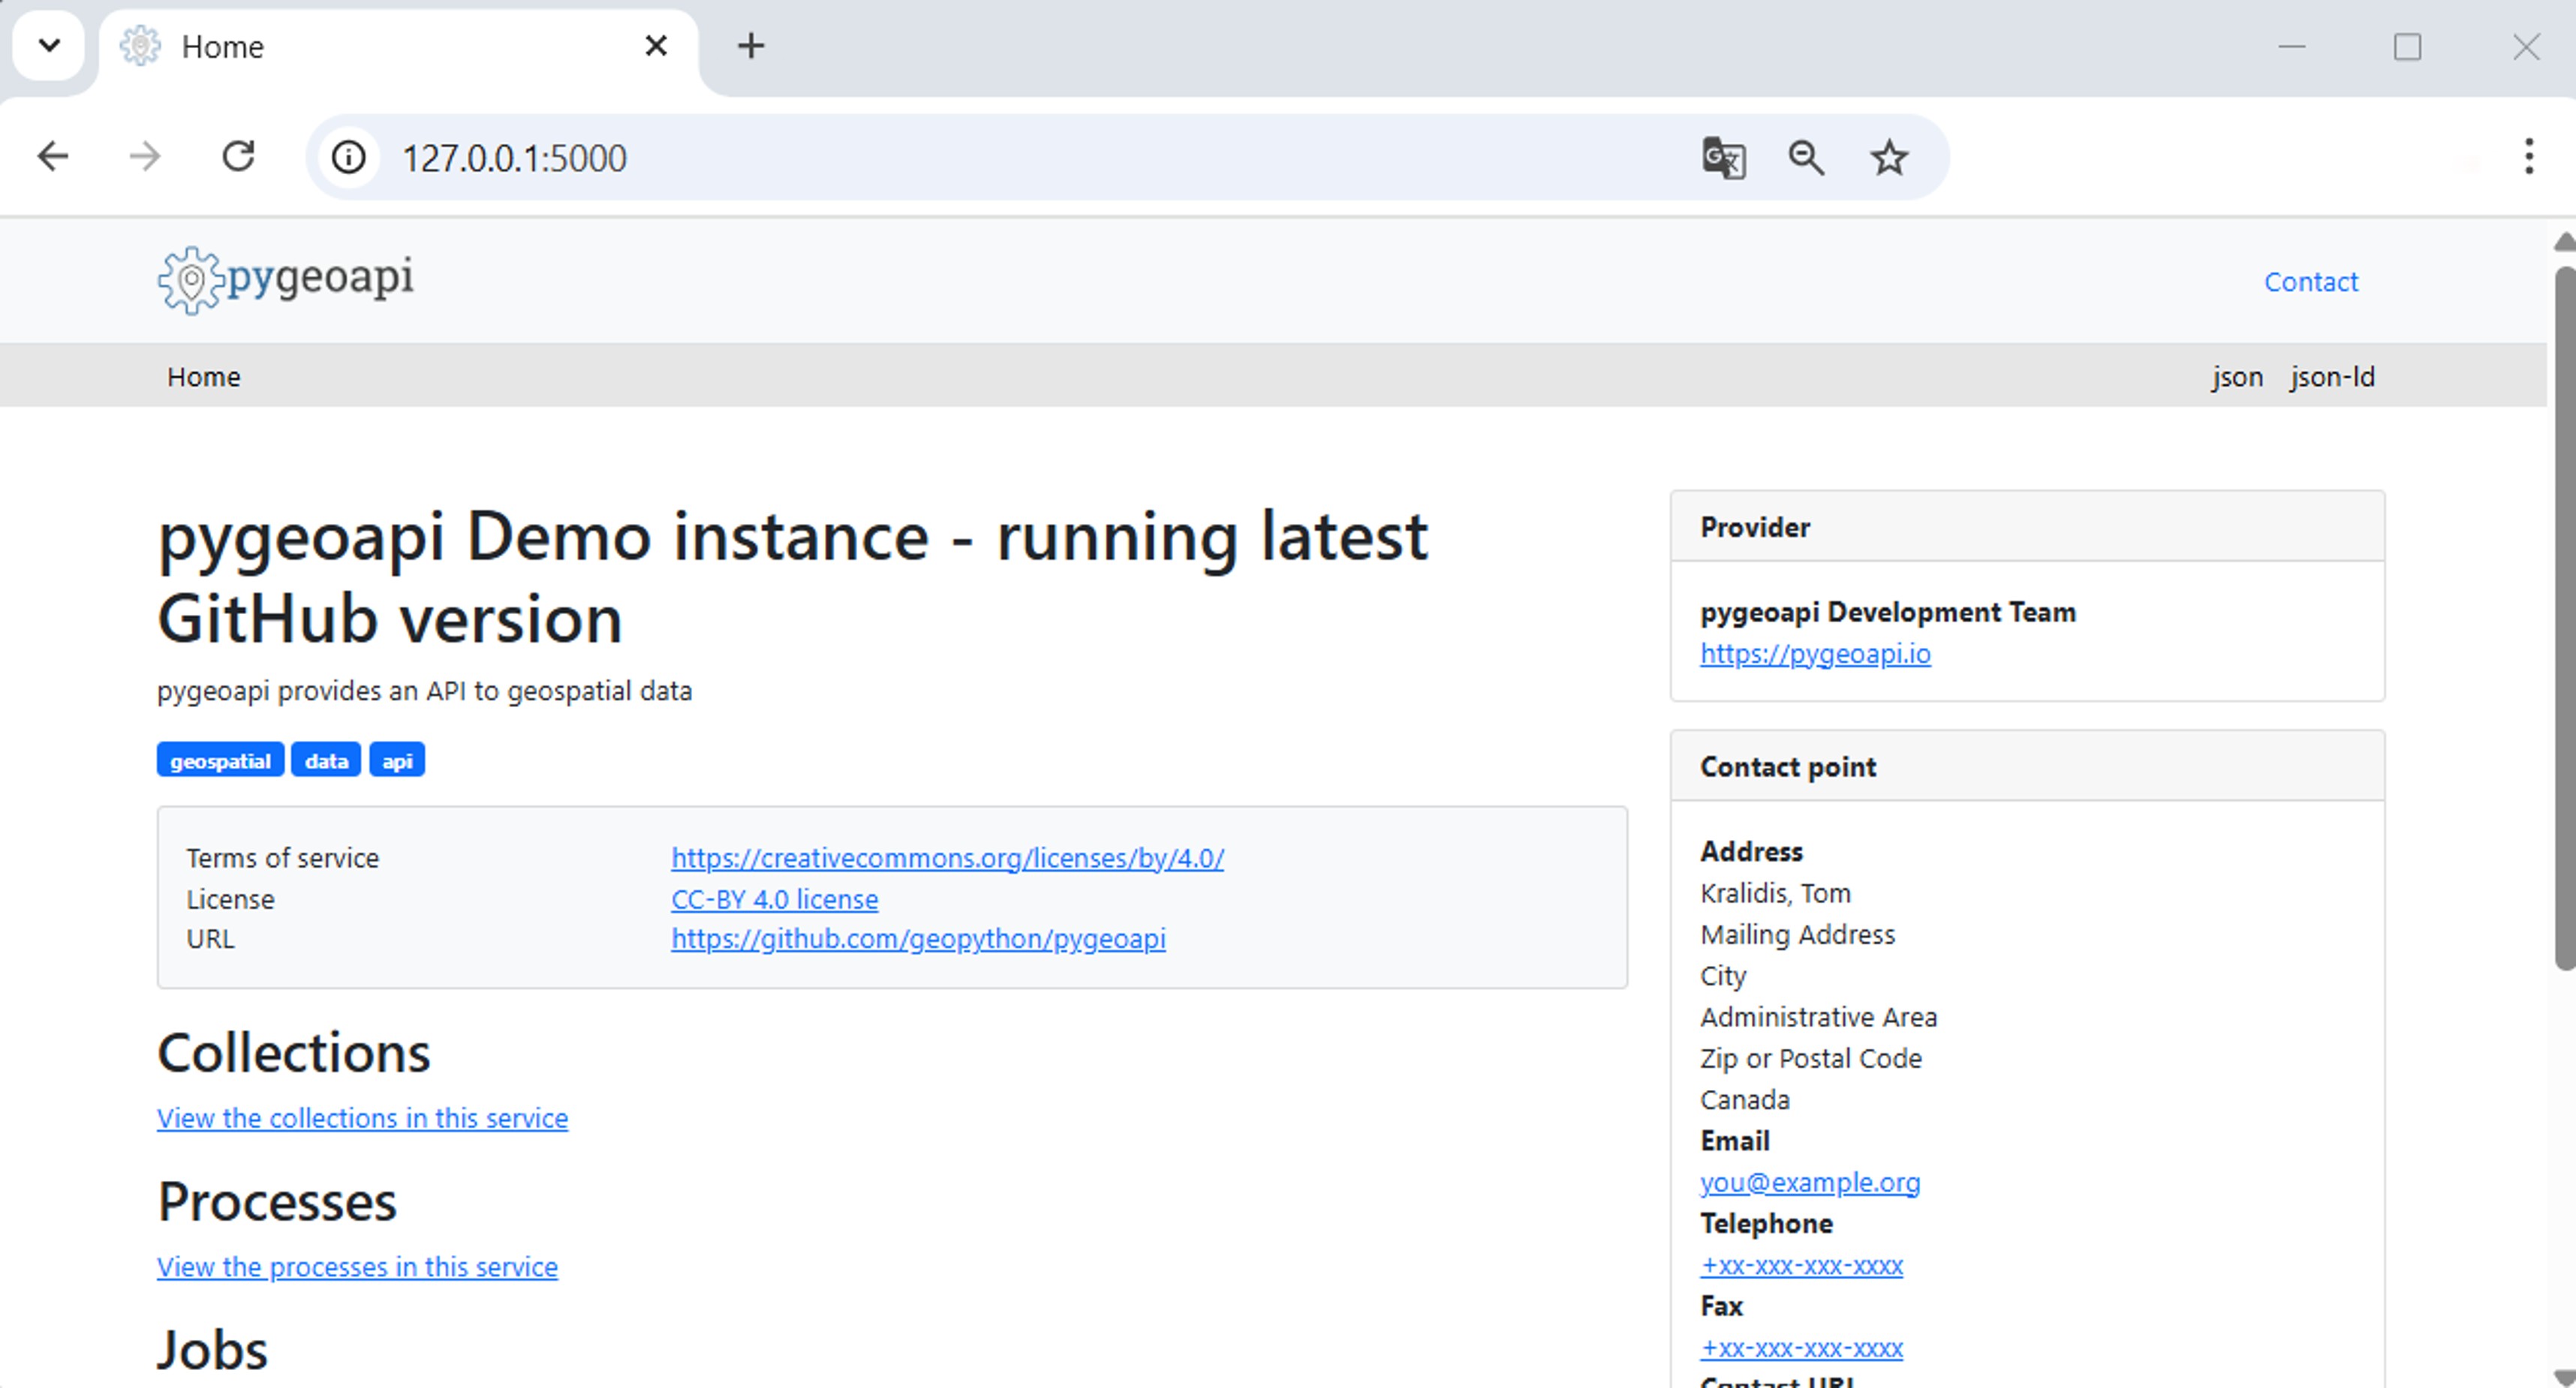
Accessing pygeoapi
Part 2: Enabling Ingress and customizing pygeoapi configuration
Introduction
In the first part of this article, We created a Service of type NodePort. NodePort Services expose applications on a specific port across all cluster nodes, forwarding incoming traffic directly to the pygeoapi Pods. Therefore we also used kubectl port-forward to proxy local requests to the Service inside the cluster, mapping local port 5000 to align with the default port expected by the pygeoapi configuration.
However, this approach is not suitable for production environments. In production Services should not be exposed directly to the outside world. Instead, external traffic is routed into the cluster through a central component acting as a gateway — the Ingress controller — which provides robust load balancing, SSL termination, and advanced routing capabilities.
When implementing Ingress, it is also necessary to adjust the pygeoapi configuration to reflect the external URL exposed through the Ingress. This configuration can be injected into the Pods using Kubernetes ConfigMaps.
In this second part, we will expose the application under the domain name pygeoapi.local with a self-signed SSL certificate, by enabling Ingress and configuring it to route external traffic to the pygeoapi Service. We will also configure pygeoapi to use a custom application configuration.
The source code is available in this repository
Clearing existing pygeoapi application
$ cd /path-to-tuto-folder/
$ make clean
kubectl delete -k .
service "pygeoapi" deleted
deployment.apps "pygeoapi" deleted
Configuring SSL certificate
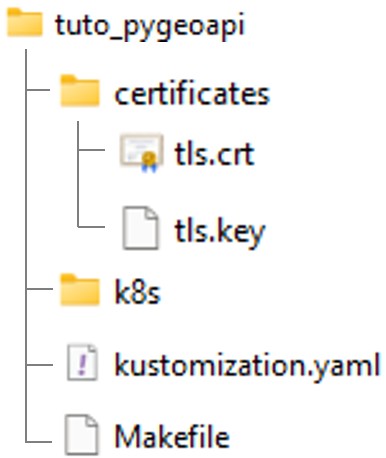
In this example we are creating a self-signed certificate. Creating a certificate folder under the project root directory.
Creating a certificate using openssl:
$ cd /path-to-tuto-folder/certificates
$ openssl req -x509 -newkey rsa:2048 -nodes -keyout tls.key -out tls.crt -days 365 -subj "/CN=pygeoapi.local/O=pygeoapi" -addext "subjectAltName=DNS:pygeoapi.local"
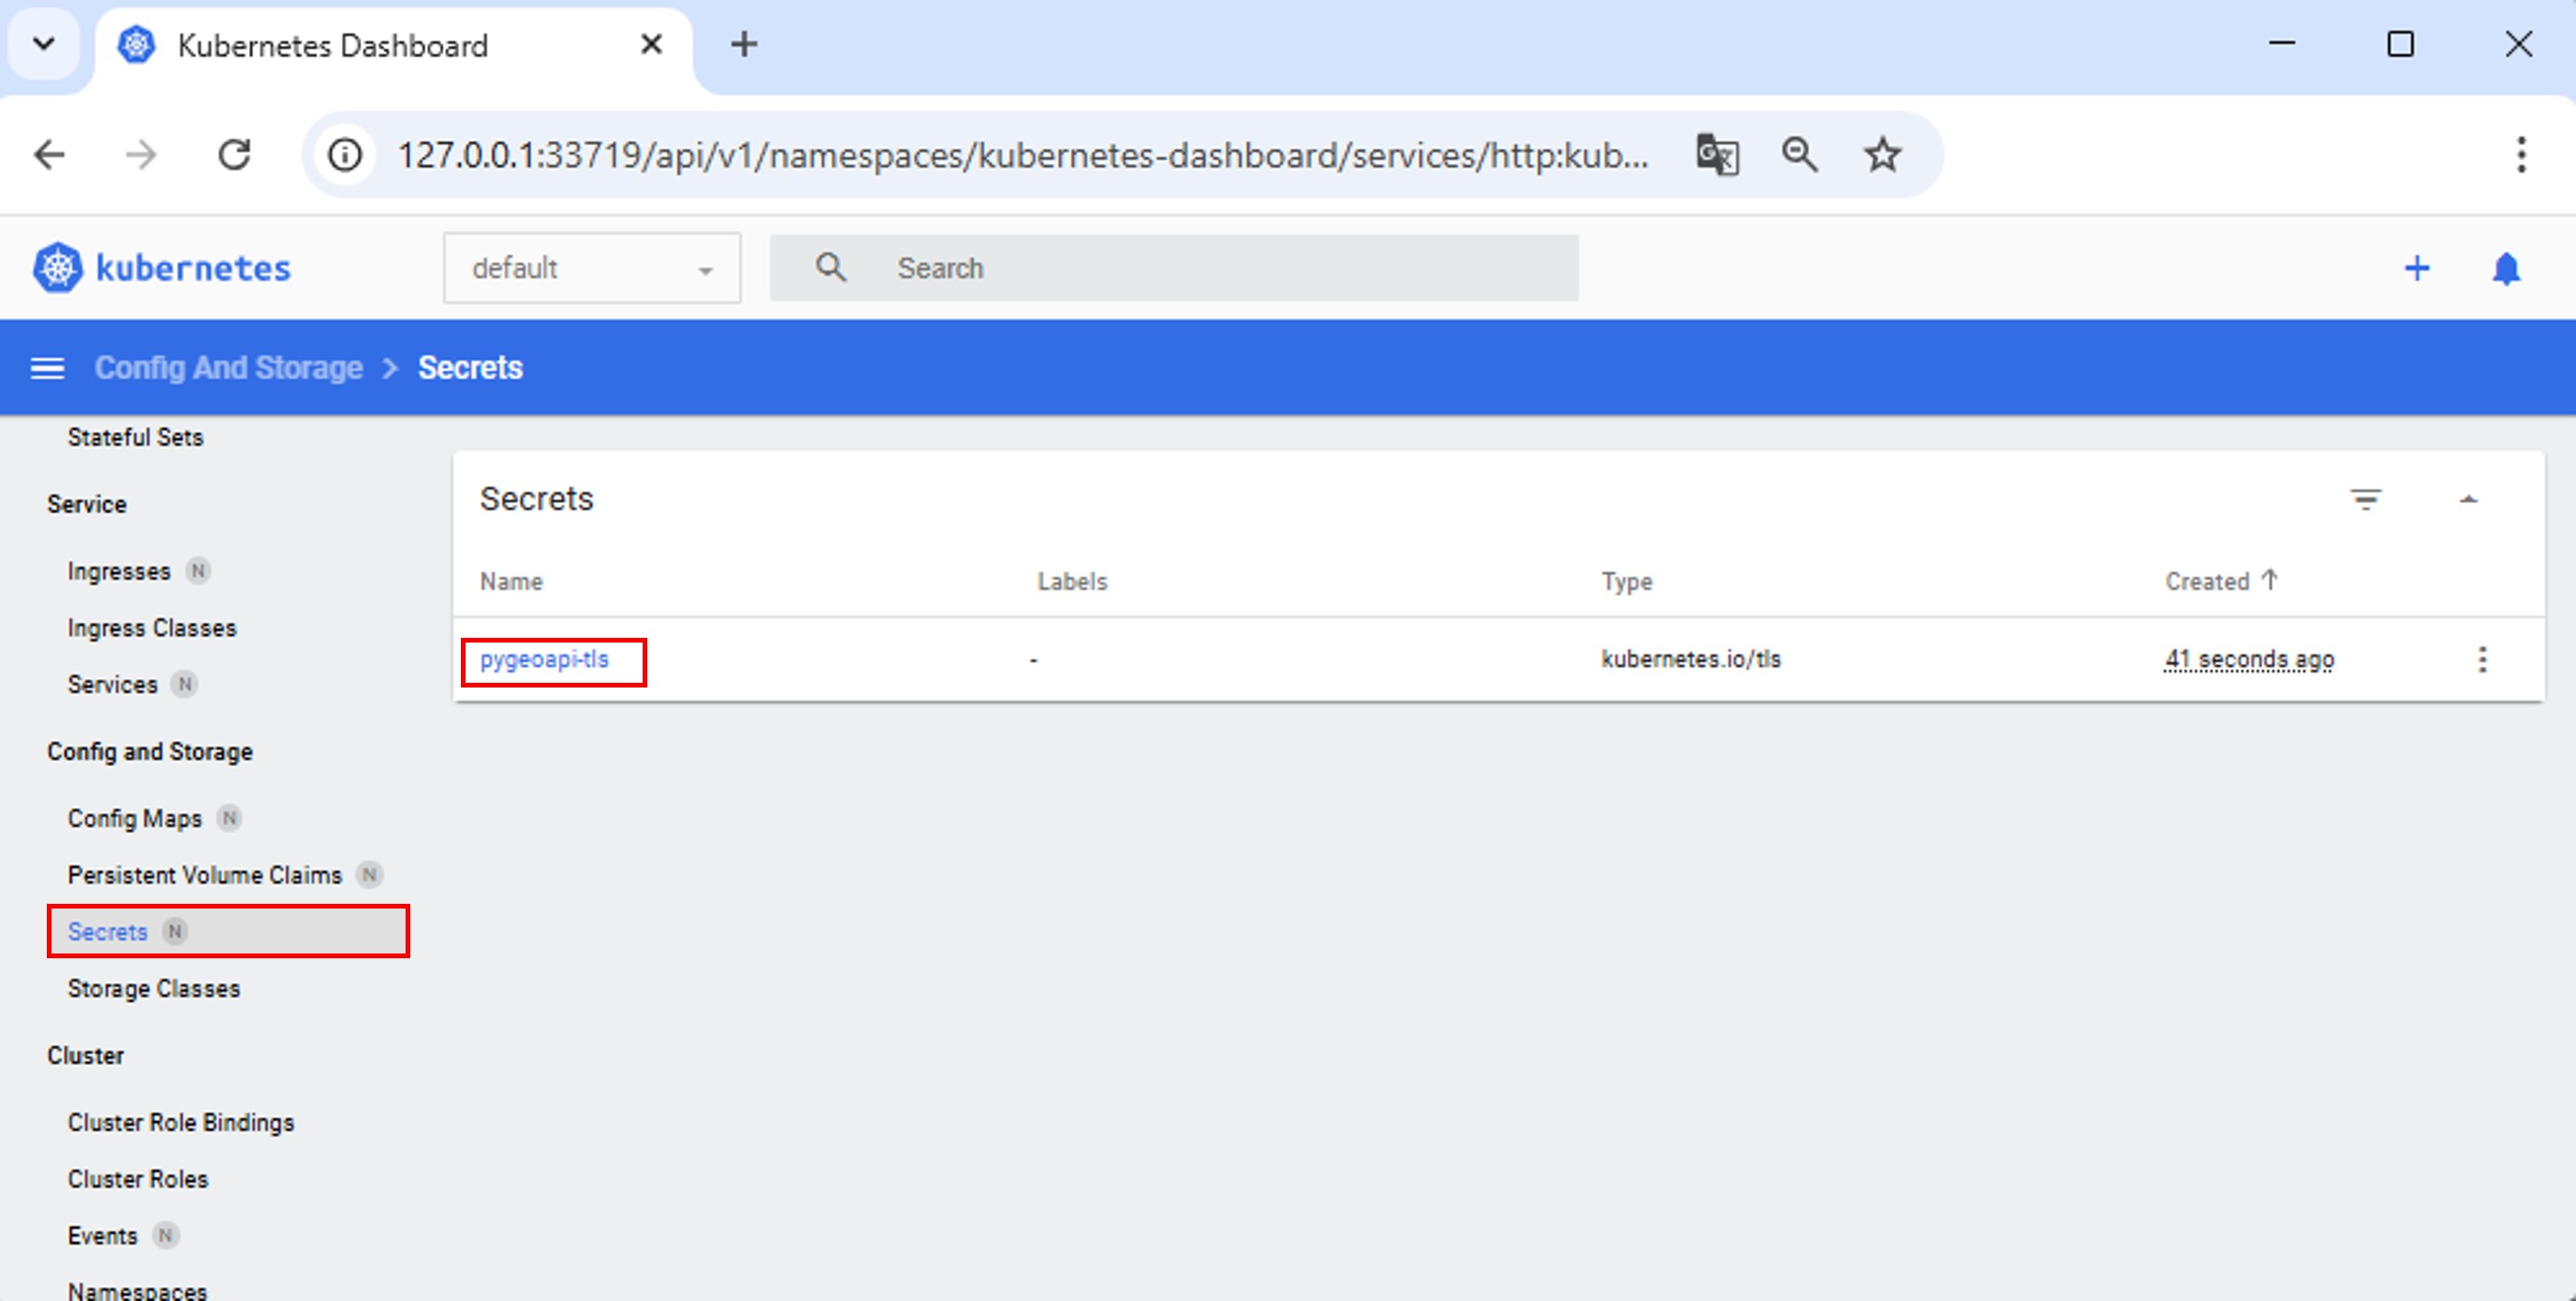
Creating a secret in minikube for the certificate
$ cd /path-to-tuto-folder/certificates
$ kubectl create secret tls pygeoapi-tls --key tls.key --cert tls.crt --namespace default
Reviewing the secret in minikube dashboard:
Or from the command line:
$ kubectl get secrets
NAME           TYPE                DATA   AGE
pygeoapi-tls   kubernetes.io/tls   2      4m49s
Optionnaly: add the certificate to the Trusted Root Certificates Store (Windows) to prevent net::ERR_CERT_COMMON_NAME_INVALID browser warning
Open Powershell as Administrator :
certutil -addstore "Root" "C:\path\to\tls.crt"
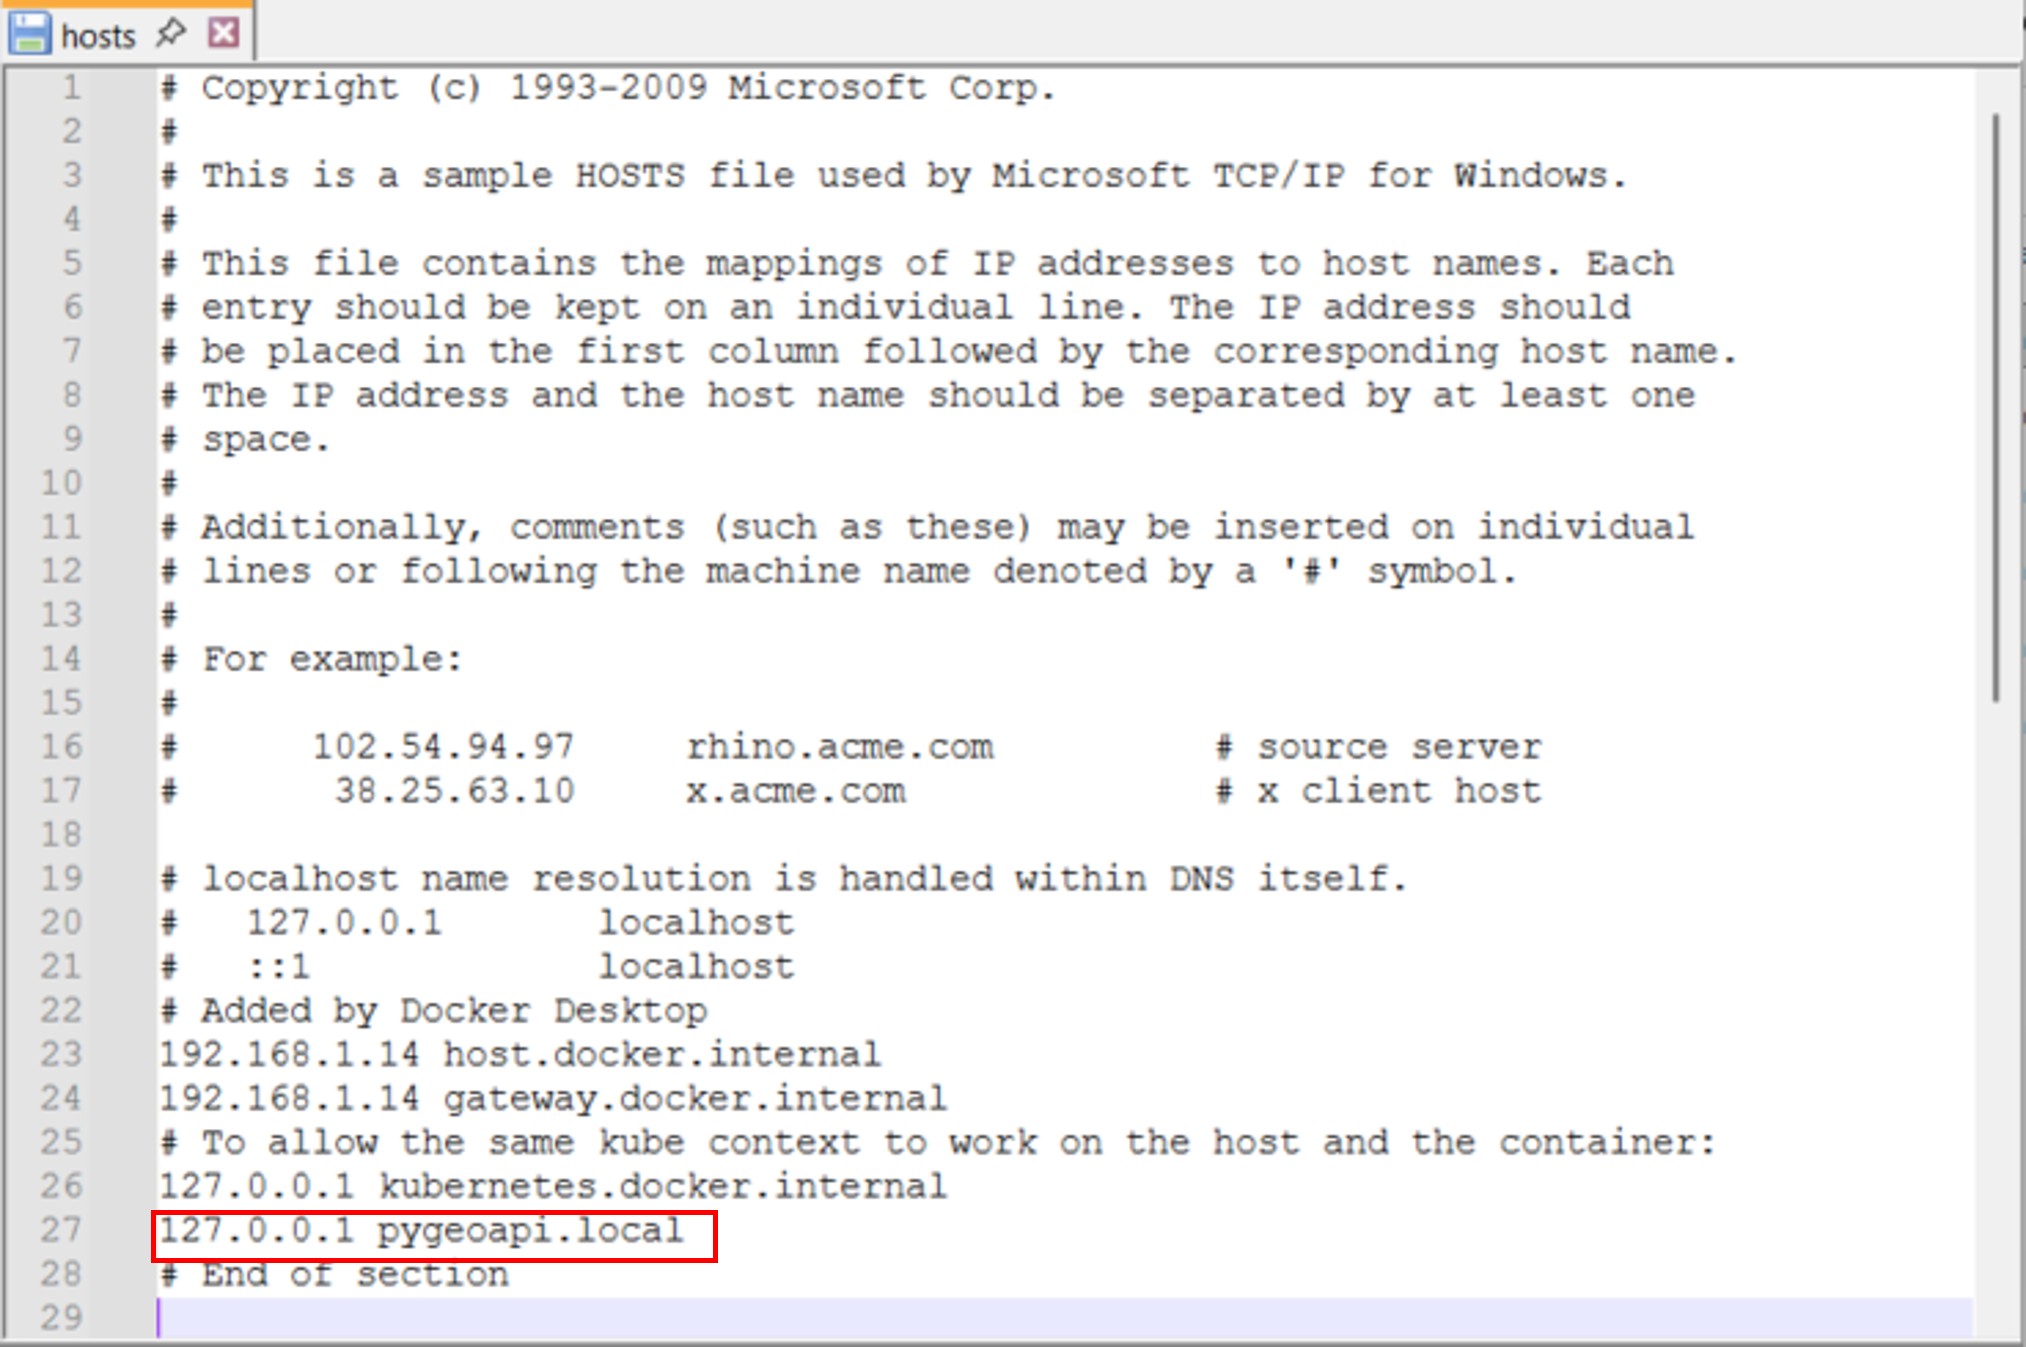
Updating hosts environment
Editing hosts file to point pygeoapi.local to localhost:
C:\Windows\System32\drivers\etc\hosts or /etc/hosts
Adding and updating pygeoapi configuration file
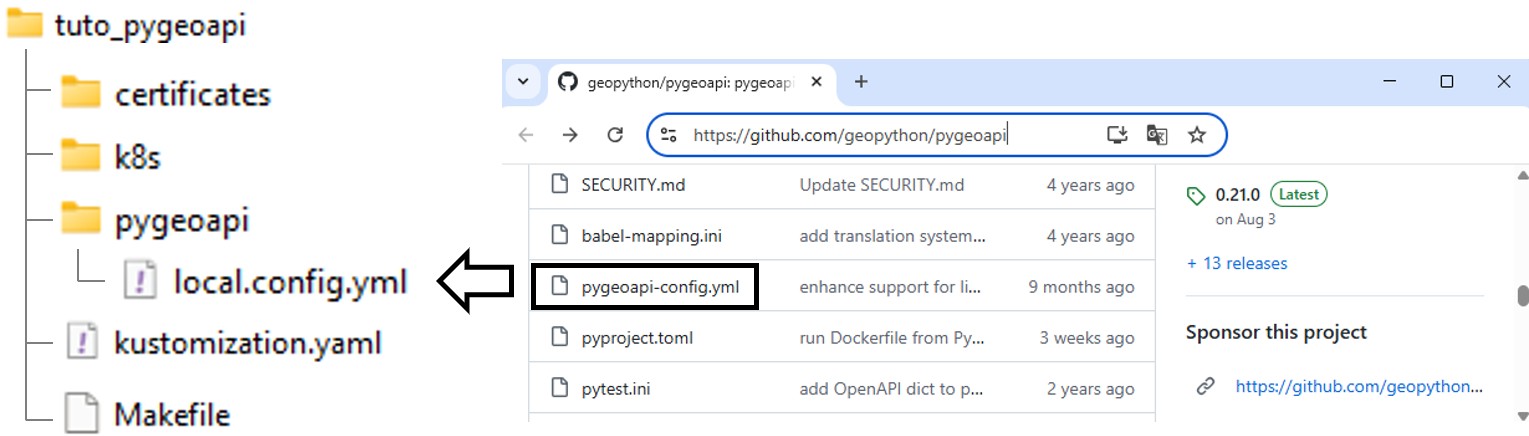
The configuration file can be found directly in the pygeoapi github repository. The name of the file is pygeoapi-config.yml.
Creating a pygeoapi folder and copy the configuration file, rename it local.config.yml so it overwrites the configuration file in pygeoapi docker image.
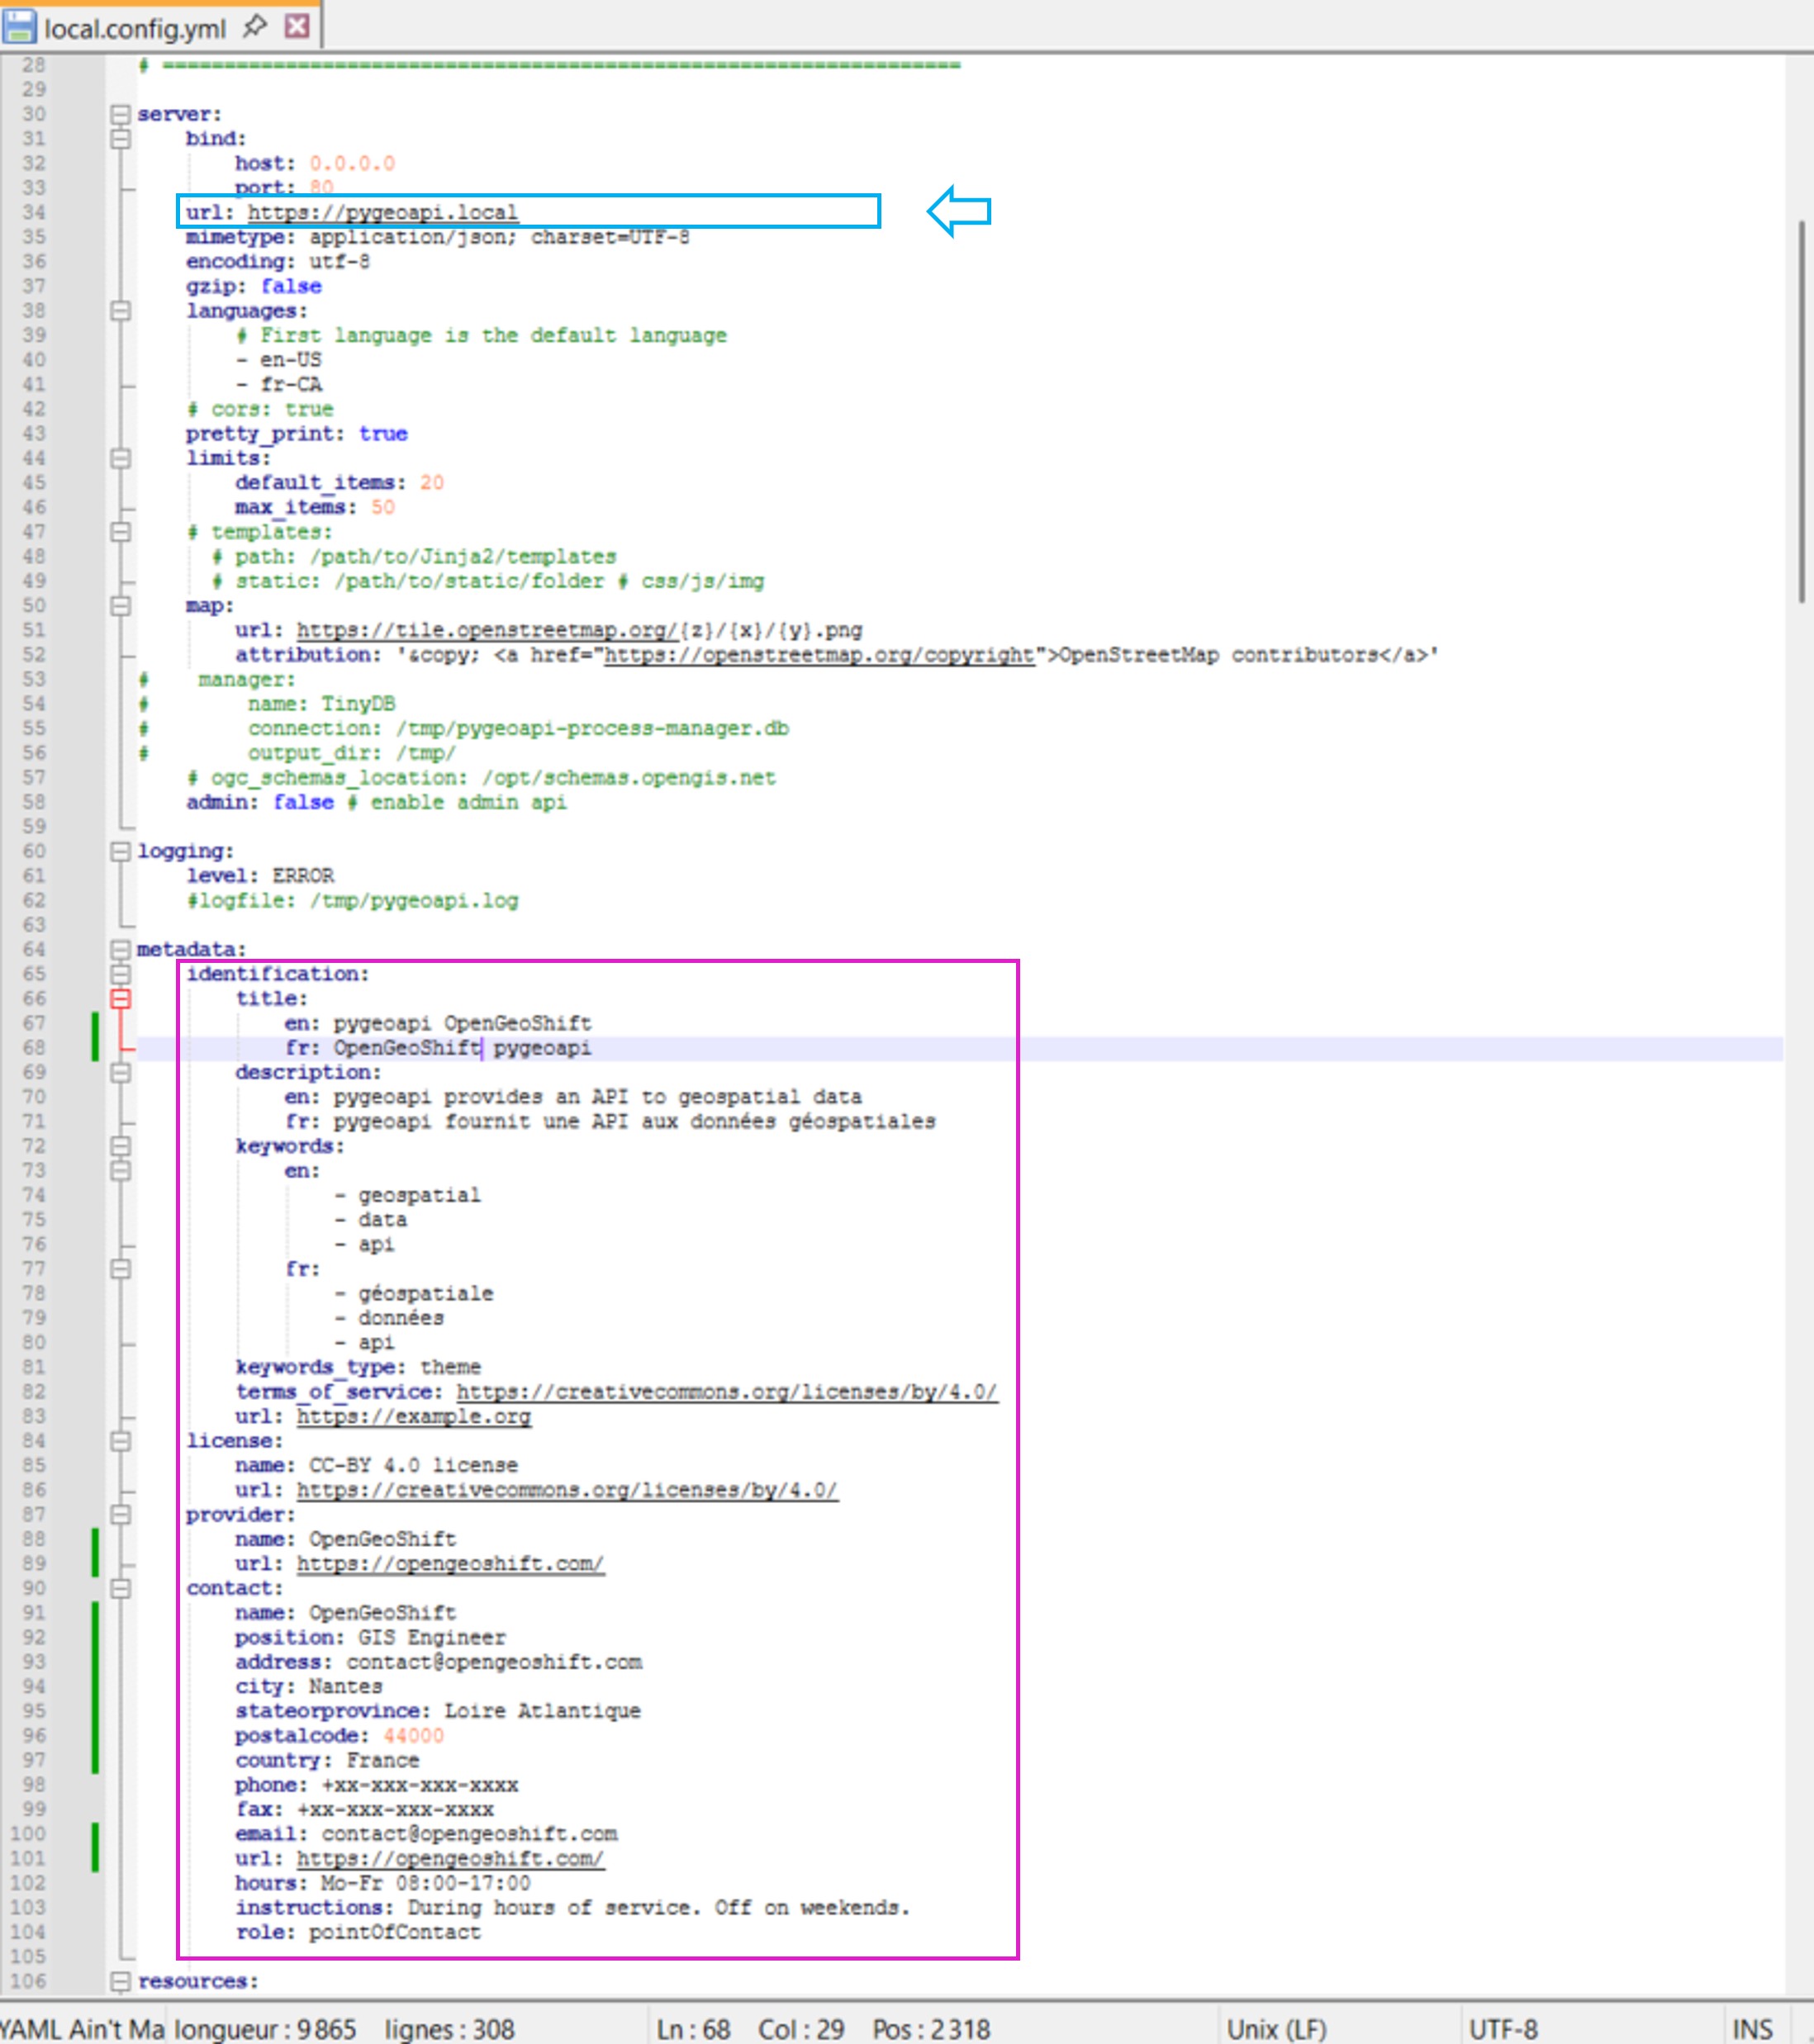
Defining url parameter value as https://pygeoapi.local.
Pygeoapi needs the external url to reflects UI paths accordingly.
Other sections can be customized such as the ‘contact’ section.
Adding pygeoapi configuration as ConfigMaps
deployment.yaml
apiVersion: apps/v1
kind: Deployment
metadata:
  name: pygeoapi
  namespace: default
spec:
  replicas: 1
  selector:
    matchLabels:
      app: pygeoapi
  template:
    metadata:
      labels:
        app: pygeoapi
    spec:
      containers:
      - name: pygeoapi
        image: geopython/pygeoapi:latest
        imagePullPolicy: IfNotPresent
        ports:
        - containerPort: 80
        volumeMounts:                               # <-----------------
        - name: config-volume                       # <-----------------
          mountPath: /pygeoapi/local.config.yml     # <-----------------
          subPath: local.config.yml                 # <-----------------
      volumes:                                      # <-----------------
      - name: config-volume                         # <-----------------
        configMap:                                  # <-----------------
          name: pygeoapi-config                     # <-----------------
kustomization.yaml
resources:
  - k8s/deployment.yaml
  - k8s/service.yaml

configMapGenerator:                 # <------
  - name: pygeoapi-config           # <------
    files:                          # <------
      - pygeoapi/local.config.yml   # <------
Creating the Ingress controller configuration file
Adding the ingress.yaml file:
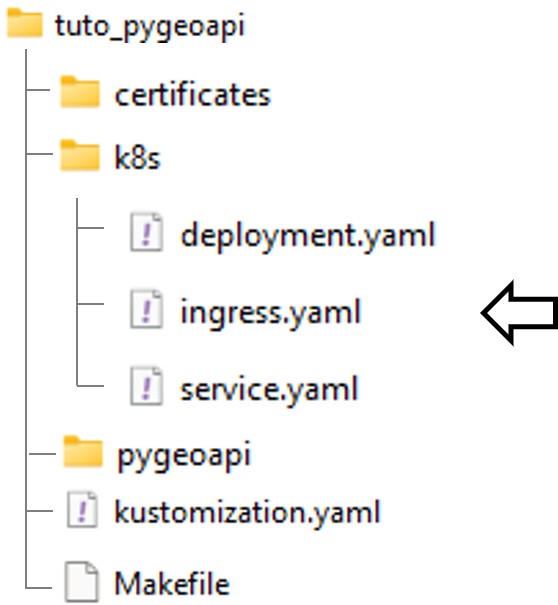
ingress.yaml
apiVersion: networking.k8s.io/v1
kind: Ingress
metadata:
  name: pygeoapi-ingress
  namespace: default
  annotations:
    nginx.ingress.kubernetes.io/rewrite-target: /
spec:
  ingressClassName: nginx
  tls:
    - hosts:
        - pygeoapi.local
      secretName: pygeoapi-tls  # <-- the certificate secret registered in kubernetes
  rules:
  - host: pygeoapi.local  # <-- configure your /etc/hosts or DNS accordingly
    http:
      paths:
      - path: /
        pathType: Prefix
        backend:
          service:
            name: pygeoapi
            port:
              number: 80
kustomization.yaml
resources:
  - k8s/deployment.yaml
  - k8s/service.yaml
  - k8s/ingress.yaml    # <------ add the ingress manifest

configMapGenerator:
  - name: pygeoapi-config
    files:
      - pygeoapi/local.config.yml
Updating pygeoapi Service type
Changing the service type to ClusterIP
service.yaml
apiVersion: v1
kind: Service
metadata:
  name: pygeoapi
  namespace: default
spec:
  selector:
    app: pygeoapi
  ports:
  - protocol: TCP
    port: 80
    targetPort: 80
  type: ClusterIP       # <--- Update NodePort to ClusterIP
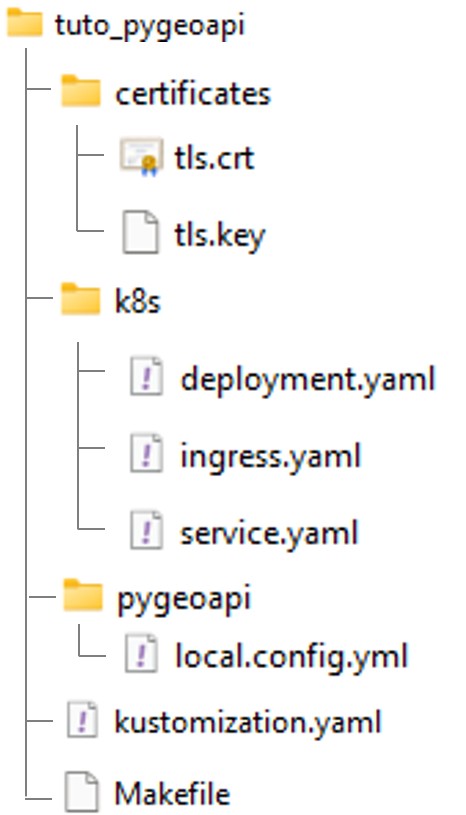
Reviewing project repository
Enabling Ingress
$ minikube addons enable ingress
💡  ingress is an addon maintained by Kubernetes. For any concerns contact minikube on GitHub.
You can view the list of minikube maintainers at: https://github.com/kubernetes/minikube/blob/master/OWNERS
    ▪ Using image registry.k8s.io/ingress-nginx/controller:v1.11.3
    ▪ Using image registry.k8s.io/ingress-nginx/kube-webhook-certgen:v1.4.4
    ▪ Using image registry.k8s.io/ingress-nginx/kube-webhook-certgen:v1.4.4
🔎  Verifying ingress addon...
🌟  The 'ingress' addon is enabled
Building and deploying the application
$ cd /path-to-tuto-folder/
$ make deploy
kubectl apply -k .
configmap/pygeoapi-config-57c2ch8kt7 created
service/pygeoapi created
deployment.apps/pygeoapi created
ingress.networking.k8s.io/pygeoapi-ingress created
Creating minikube tunnel
This is required when running the minikube cluster through WSL to route localhost requests to the minikube cluster.
$ minikube tunnel
✅  Tunnel successfully started

📌  NOTE: Please do not close this terminal as this process must stay alive for the tunnel to be accessible ...

❗  The service/ingress pygeoapi-ingress requires privileged ports to be exposed: [80 443]
🔑  sudo permission will be asked for it.
🏃  Starting tunnel for service pygeoapi-ingress.
[sudo] password for <user>:
Accessing pygeoapi

Conclusion
The result of this chapter is a minimal implementation consisting of an Ingress controller and a Service exposing a single pygeoapi pod. The deployment is now automated using manifests and make commands, and we have also customized the configuration of pygeoapi.
The next step is to explore pygeoapi’s plugin architecture through the deployment of an OGC Processes service.
You can now delete the deployment.
make clean